Having all of your stormwater sampling supplies on hand and easily accessible is an essential way to ensure that you never miss a sampling event. While some special circumstances may require specialty equipment, these are the basic items that should have a space in every samplers tool kit:
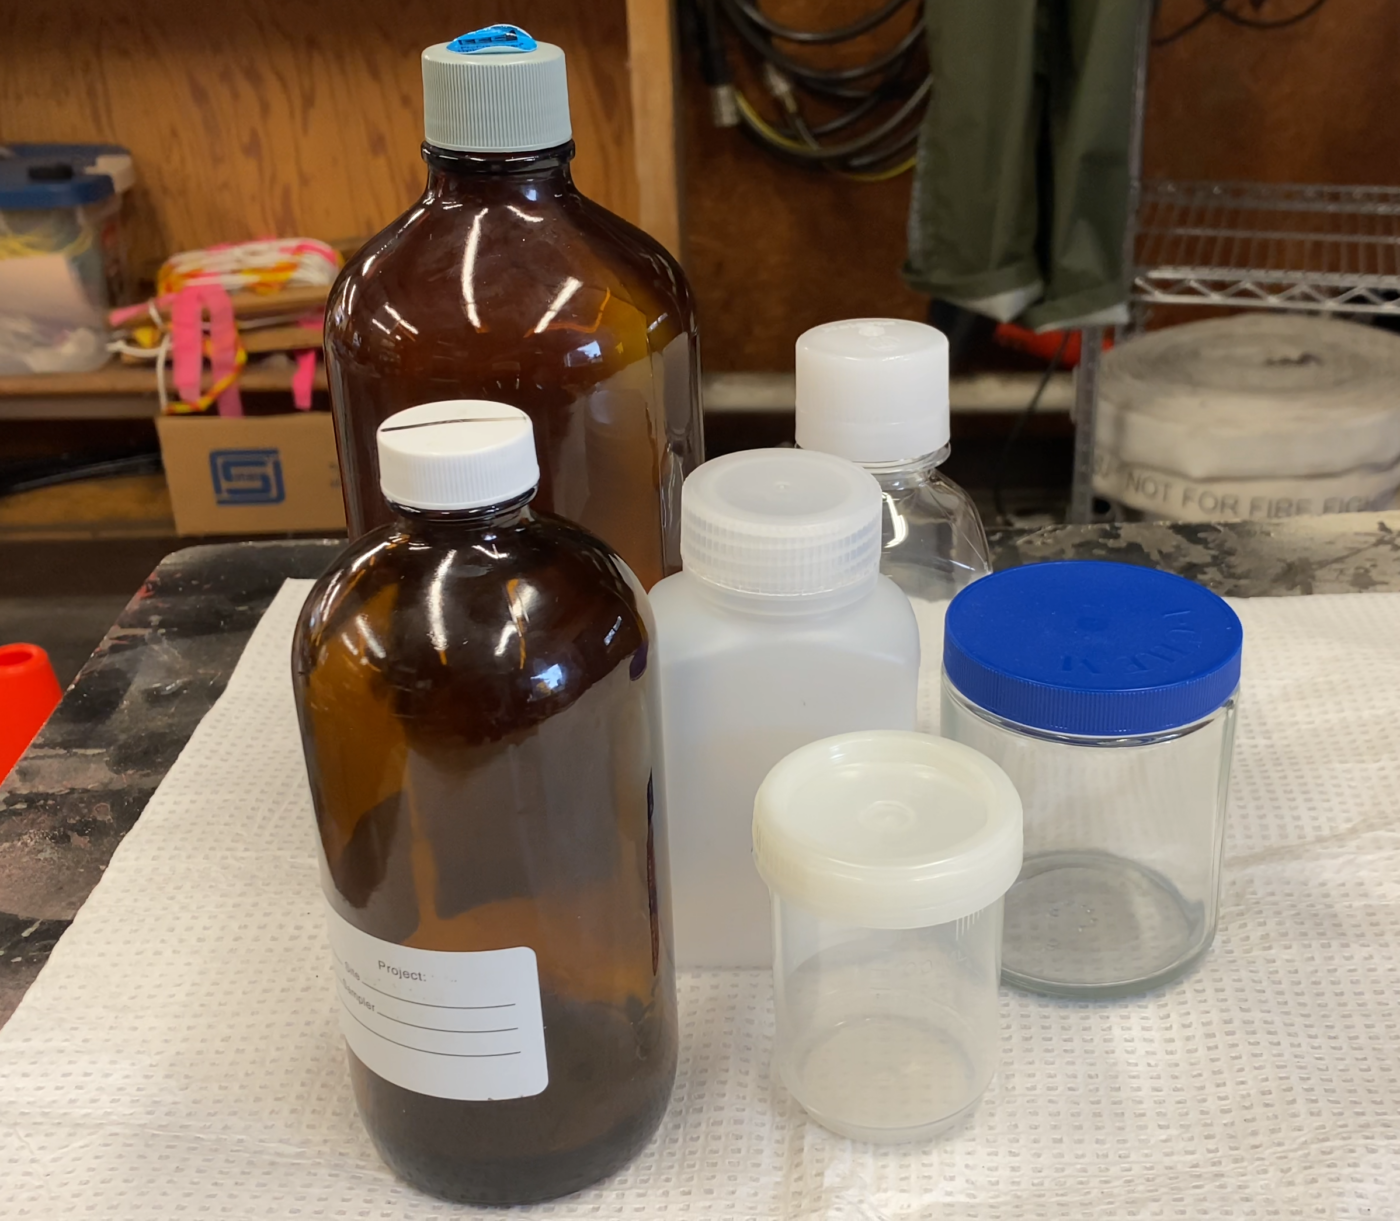
1. Sample Bottles
Sample bottles are critical to have on hand. You should reach out to your lab for sample bottles, as they will know the exact type and volume you will need for each parameter. They will also be familiar with the proper cleanliness standards that are required and will ensure that there isn’t a chance of contaminating your samples due to poor-quality bottles. Keeping an extra set of bottles on hand in cases of breakage or accidental contamination is a good idea. It is also worth discussing any special circumstances with your lab. For example, a lab may be able to provide you with a wide-mouth bottle if you are only able to sample sheet flow in a small depression.
2. Sampling Aids
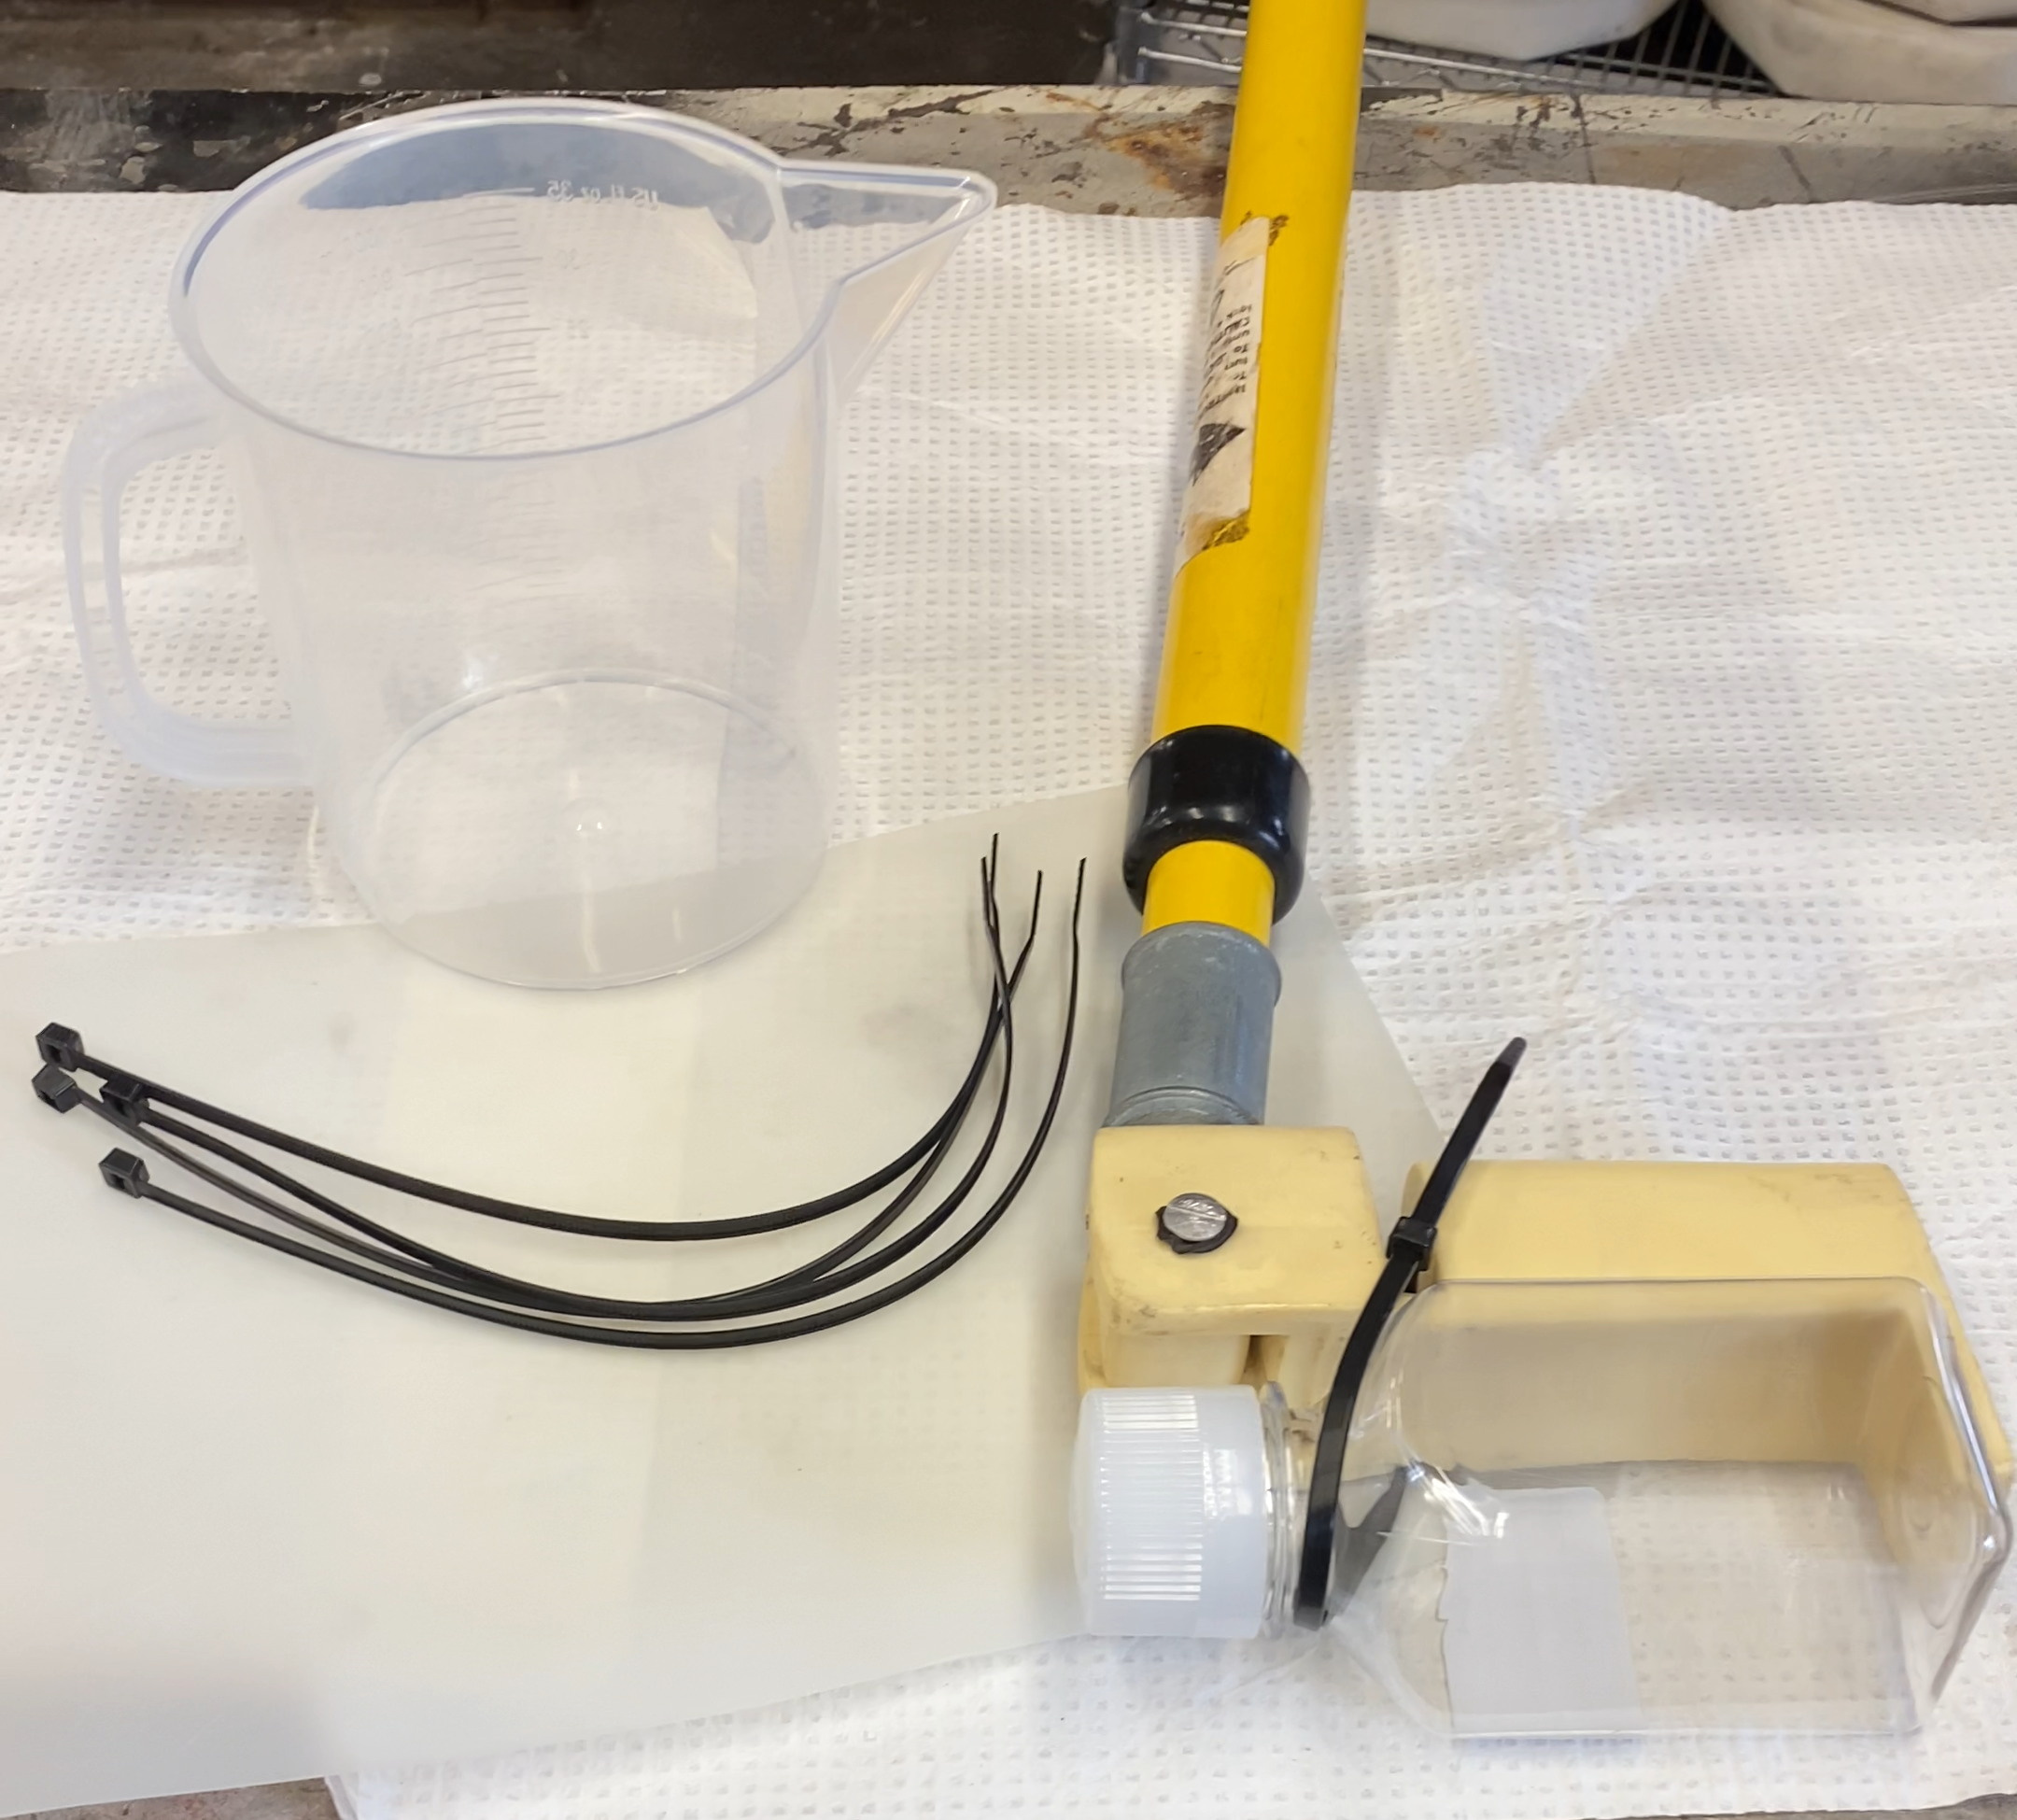
You will often be required to sample in areas that are difficult to access with just a sample bottle and your hand. Sampling poles are a great tool to help reach that pipe towards the bottom of a catch basin, or even an outlet pipe on a steep embankment. Always make sure you have a way to secure the bottle to the pole- oftentimes a rubber band or a zip tie is easier than the supplied strap.
Other sampling aids include secondary containers or plastic sheeting that can assist with sampling sheet flow. You want to make sure that these secondary containers are thoroughly cleaned between each sampling point. Secondary containers are typically seen as a last resort, and in cases such as TPH sampling, can be forbidden. Talk with your lab about options if you need to use a secondary container.
3. Paperwork
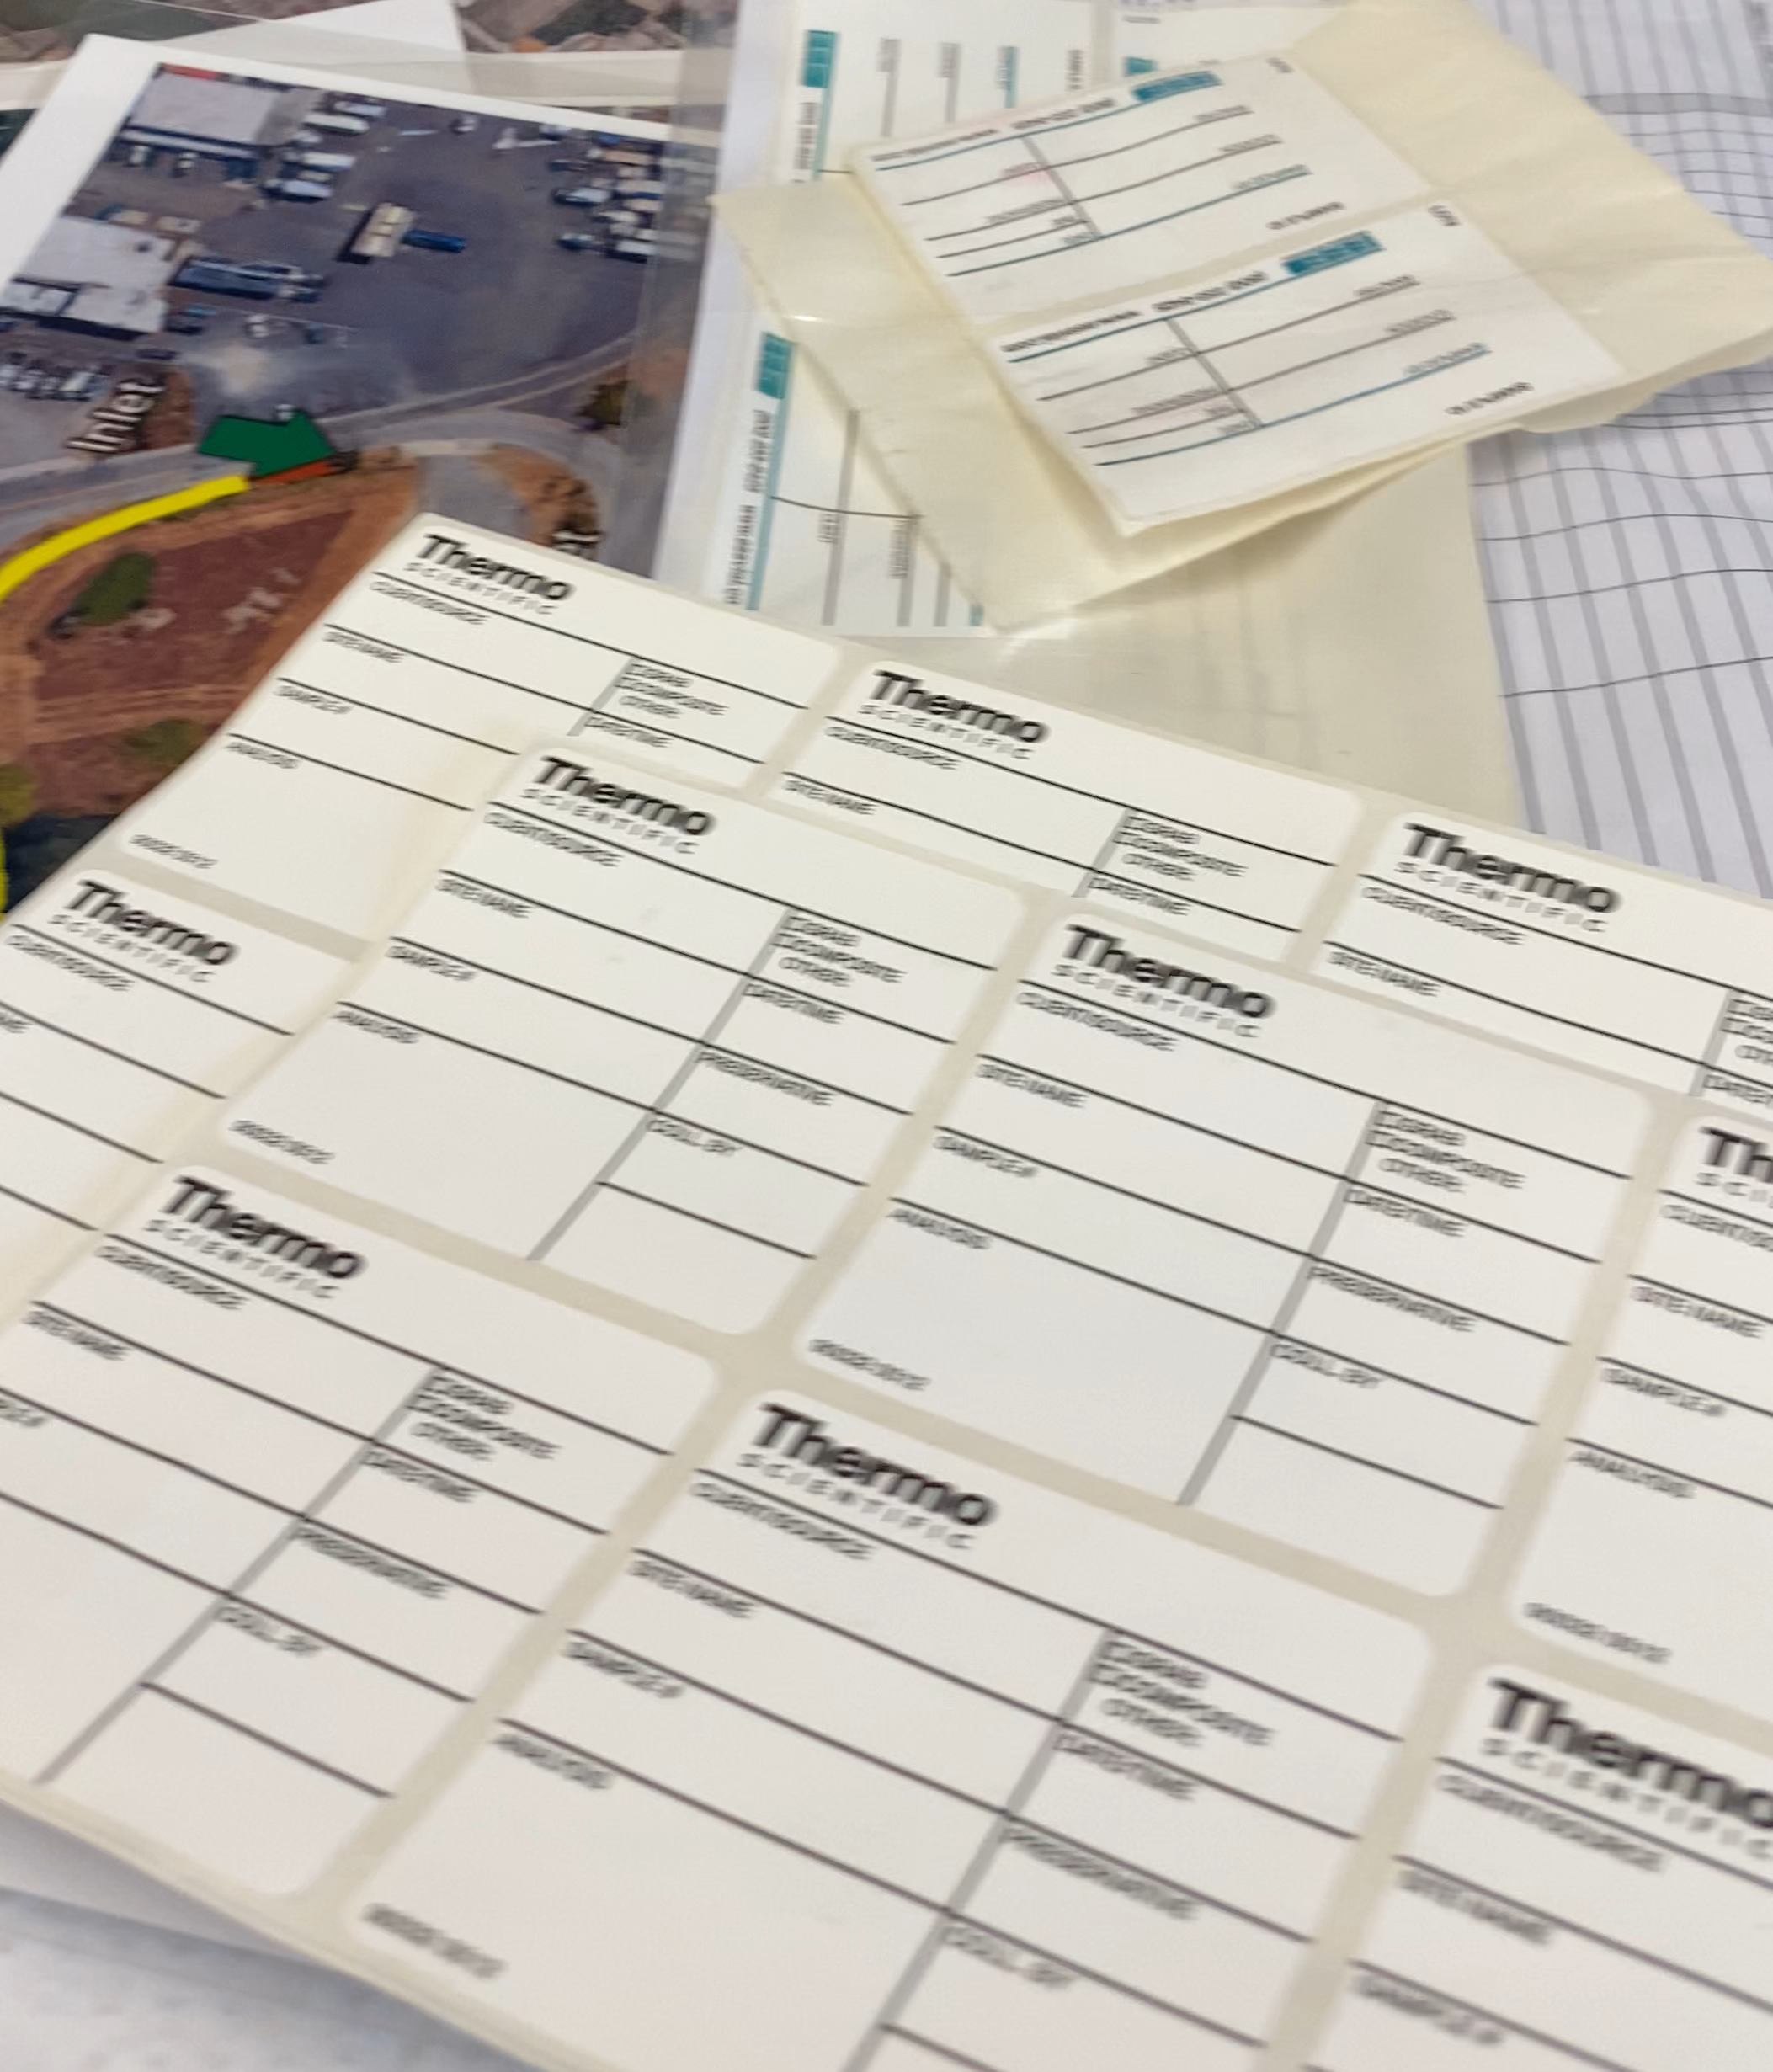
COC form
I like to keep a couple of Chain of Custody (COC) forms in my binder, ready to go for sampling. Don’t wait to fill out your COC at the lab. It is a good idea to have the COC form filled out on your property so you can double and triple-check that you have all of the samples you need, that you have all of the analytes requested on the form, and that all of your bottle labels match the form. This form is a critical piece of paperwork, and precautions should be taken to ensure that it stays dry and legible for the lab. A reputable lab should review the COC with you before you leave the building to clarify any discrepancies. Analytes that are shipped should have the COC form sealed in a ziplock bag and have a digital copy emailed to the lab.
Site maps
A set of laminated site maps/pictures is a great tool for you to keep track of your sampling locations. In some cases, you may have to sample one of several pipes in the bottom of a catch basin, and it is a good idea to have a reference for which catch basin you are supposed to sample, and which pipe within that catch basin you should sample from. This information can be even more critical if there are large lags between sampling events due to infrequent discharge.
Bottle Labels
Your sample bottles will often come with labels attached, but it is a good idea to have an extra sheet of labels on hand just in case. Your bottle labels should match your COC form and contain information such as the sample ID, your name, the sample analyte, the date and time the sample was collected, and the project or company name your lab references.
Notebook
When taking your sample, you should take a few seconds to jot down notes about what you are seeing. What is the weather like? Has it been raining for a long time, or did it just start? Are the BMPs near this sampling location in good condition? Do you see anything nearby that may be contributing to stormwater pollution? These notes may be essential to tracking down issues that cause a benchmark exceedance and could be the difference between a simple Level 1 Corrective Action, or a more expensive Level 2 or 3. A notebook with waterproof paper is a must when working in wet conditions.
4. pH Equipment

pH Pen
A pH pen provides a quick and reliable way to measure the pH of your samples. Always follow your manufacturer-recommended calibration and storage procedure to ensure accurate results and prolong the life of your device. Since calibration only takes a couple of minutes, it is advised to calibrate before every sampling event.
Calibration Standards
In most cases, your calibration procedure will require 3 solutions of a known pH. These solutions, also known as buffers, usually come as pH 4.0, pH 7.0, and pH 10.0. These can be found readily online, and come in many forms from single-use packets to large bottles with enough solution to supply an entire lab. It is important to note that these calibration standards have a relatively short shelf life- often less than 12 months for the pH 4 and pH 7 standards, and as little as 3-6 months for the pH 10 standard. Always check the expiration dates, and replenish as needed to ensure quality readings.
Storage Solution
The electrode on your pH pen will need to be stored in a storage solution to prolong the life of the device. This solution can easily dry up or spill out of the storage container, so always have some on hand, and double-check its level when putting the pen away until the next sampling event. In a pinch, a pH 4 or pH 7 calibration solution can work until you can get a fresh storage solution on-site. In some cases, a salty crust can appear on the outside of the electrode. This is normal and can be washed off with water before use.
pH Test Strips
While the wide measurement range and exceptional precision make the pH pen my go-to, pH Test strips are another good option for measuring pH. These strips often come in rolls or individual strips in a waterproof container. These should have a resolution of ±0.5 Standard Units or better. pH strips are often sold in a narrow range on the pH scale. Remember that the acceptable range for pH in stormwater is 5.0-0.0, so sure you are purchasing strips that can read within the expected range of your stormwater. Even if you have a pH pen on hand, these strips can make a great backup option as they don’t require calibration and can last for years if stored properly.
5. Turbidity Equipment
Turbidity is one of the few parameters that can be measured on-site without having to be sent off to a lab. With some initial upfront cost, you can have all the equipment you need to get instant feedback on the turbidity discharging from your site. Being able to measure this in-house also gives you the ability to monitor and locate where any trouble areas are originating from.
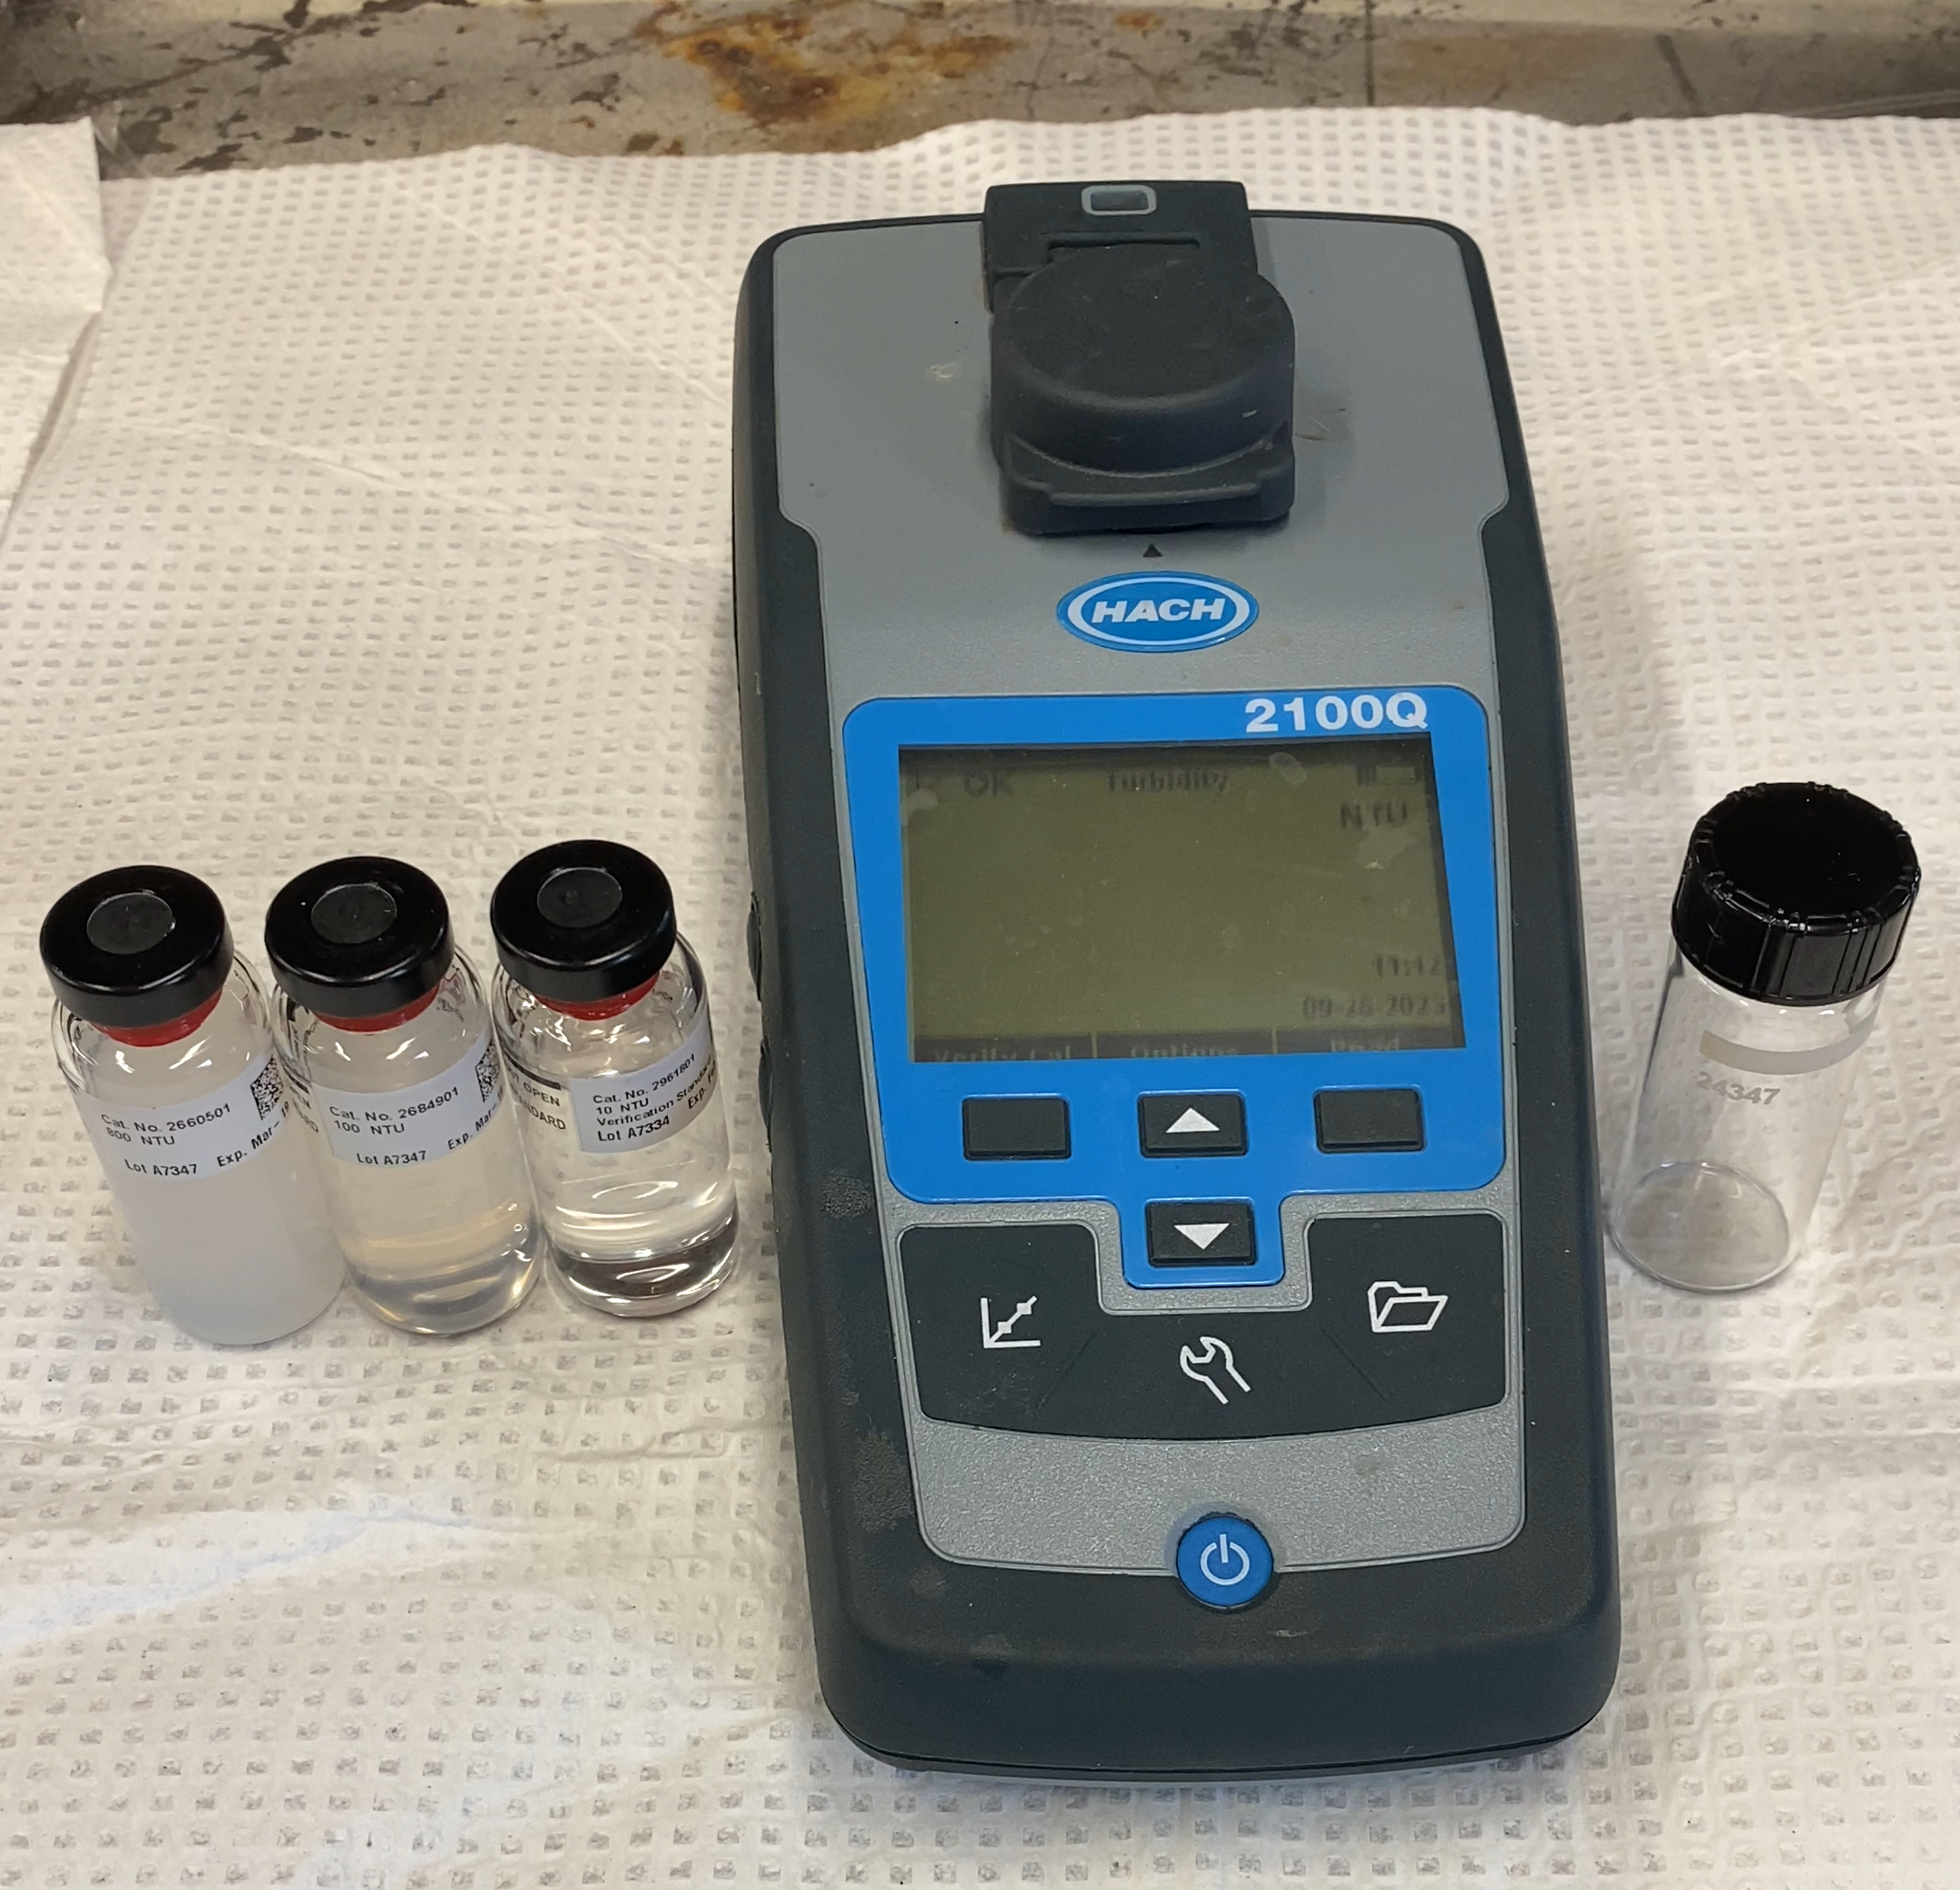
Turbidity meter
A Turbidity meter (aka turbidimeter) works by shooting a laser of light through a glass vial filled with your stormwater sample, and measuring how much that light is scattered by particles in your sample. It will then return that measurement in Nephelometric Turbidity Units, commonly referred to as NTUs. Portable turbidimeters are battery-powered and robust enough to join you in the field.
Calibration Standards
Just like with pH, our Turbidity meter needs to be calibrated. Calibration procedures may vary from manufacturer to manufacturer but often require a range of 3 calibration standards with High, Medium, and Low NTU values. These standards have a much longer shelf-life than those for pH, however, care must be taken to ensure that the calibration bottles are not smudged or scratched before calibrating.
Sample Cells
Your turbidimeter will likely require a specialized sample cell or small glass vial to measure the sample in. These sample cells must remain scratch and smudge-free, as a scratch or fingerprint could refract the light from the turbidimeter in a way that gives a false reading. These sample cells will often be included with your turbidimeter, however, it might be a good idea to have an extra on hand.
Silicone oil
Some turbidity meters suggest a light coating of silicone oil on the outside of the sample cell to help prevent scratches from impacting sample readings. Check with your manufacturer’s recommendations for the use of silicone oil.
6. Sample Handling Gear
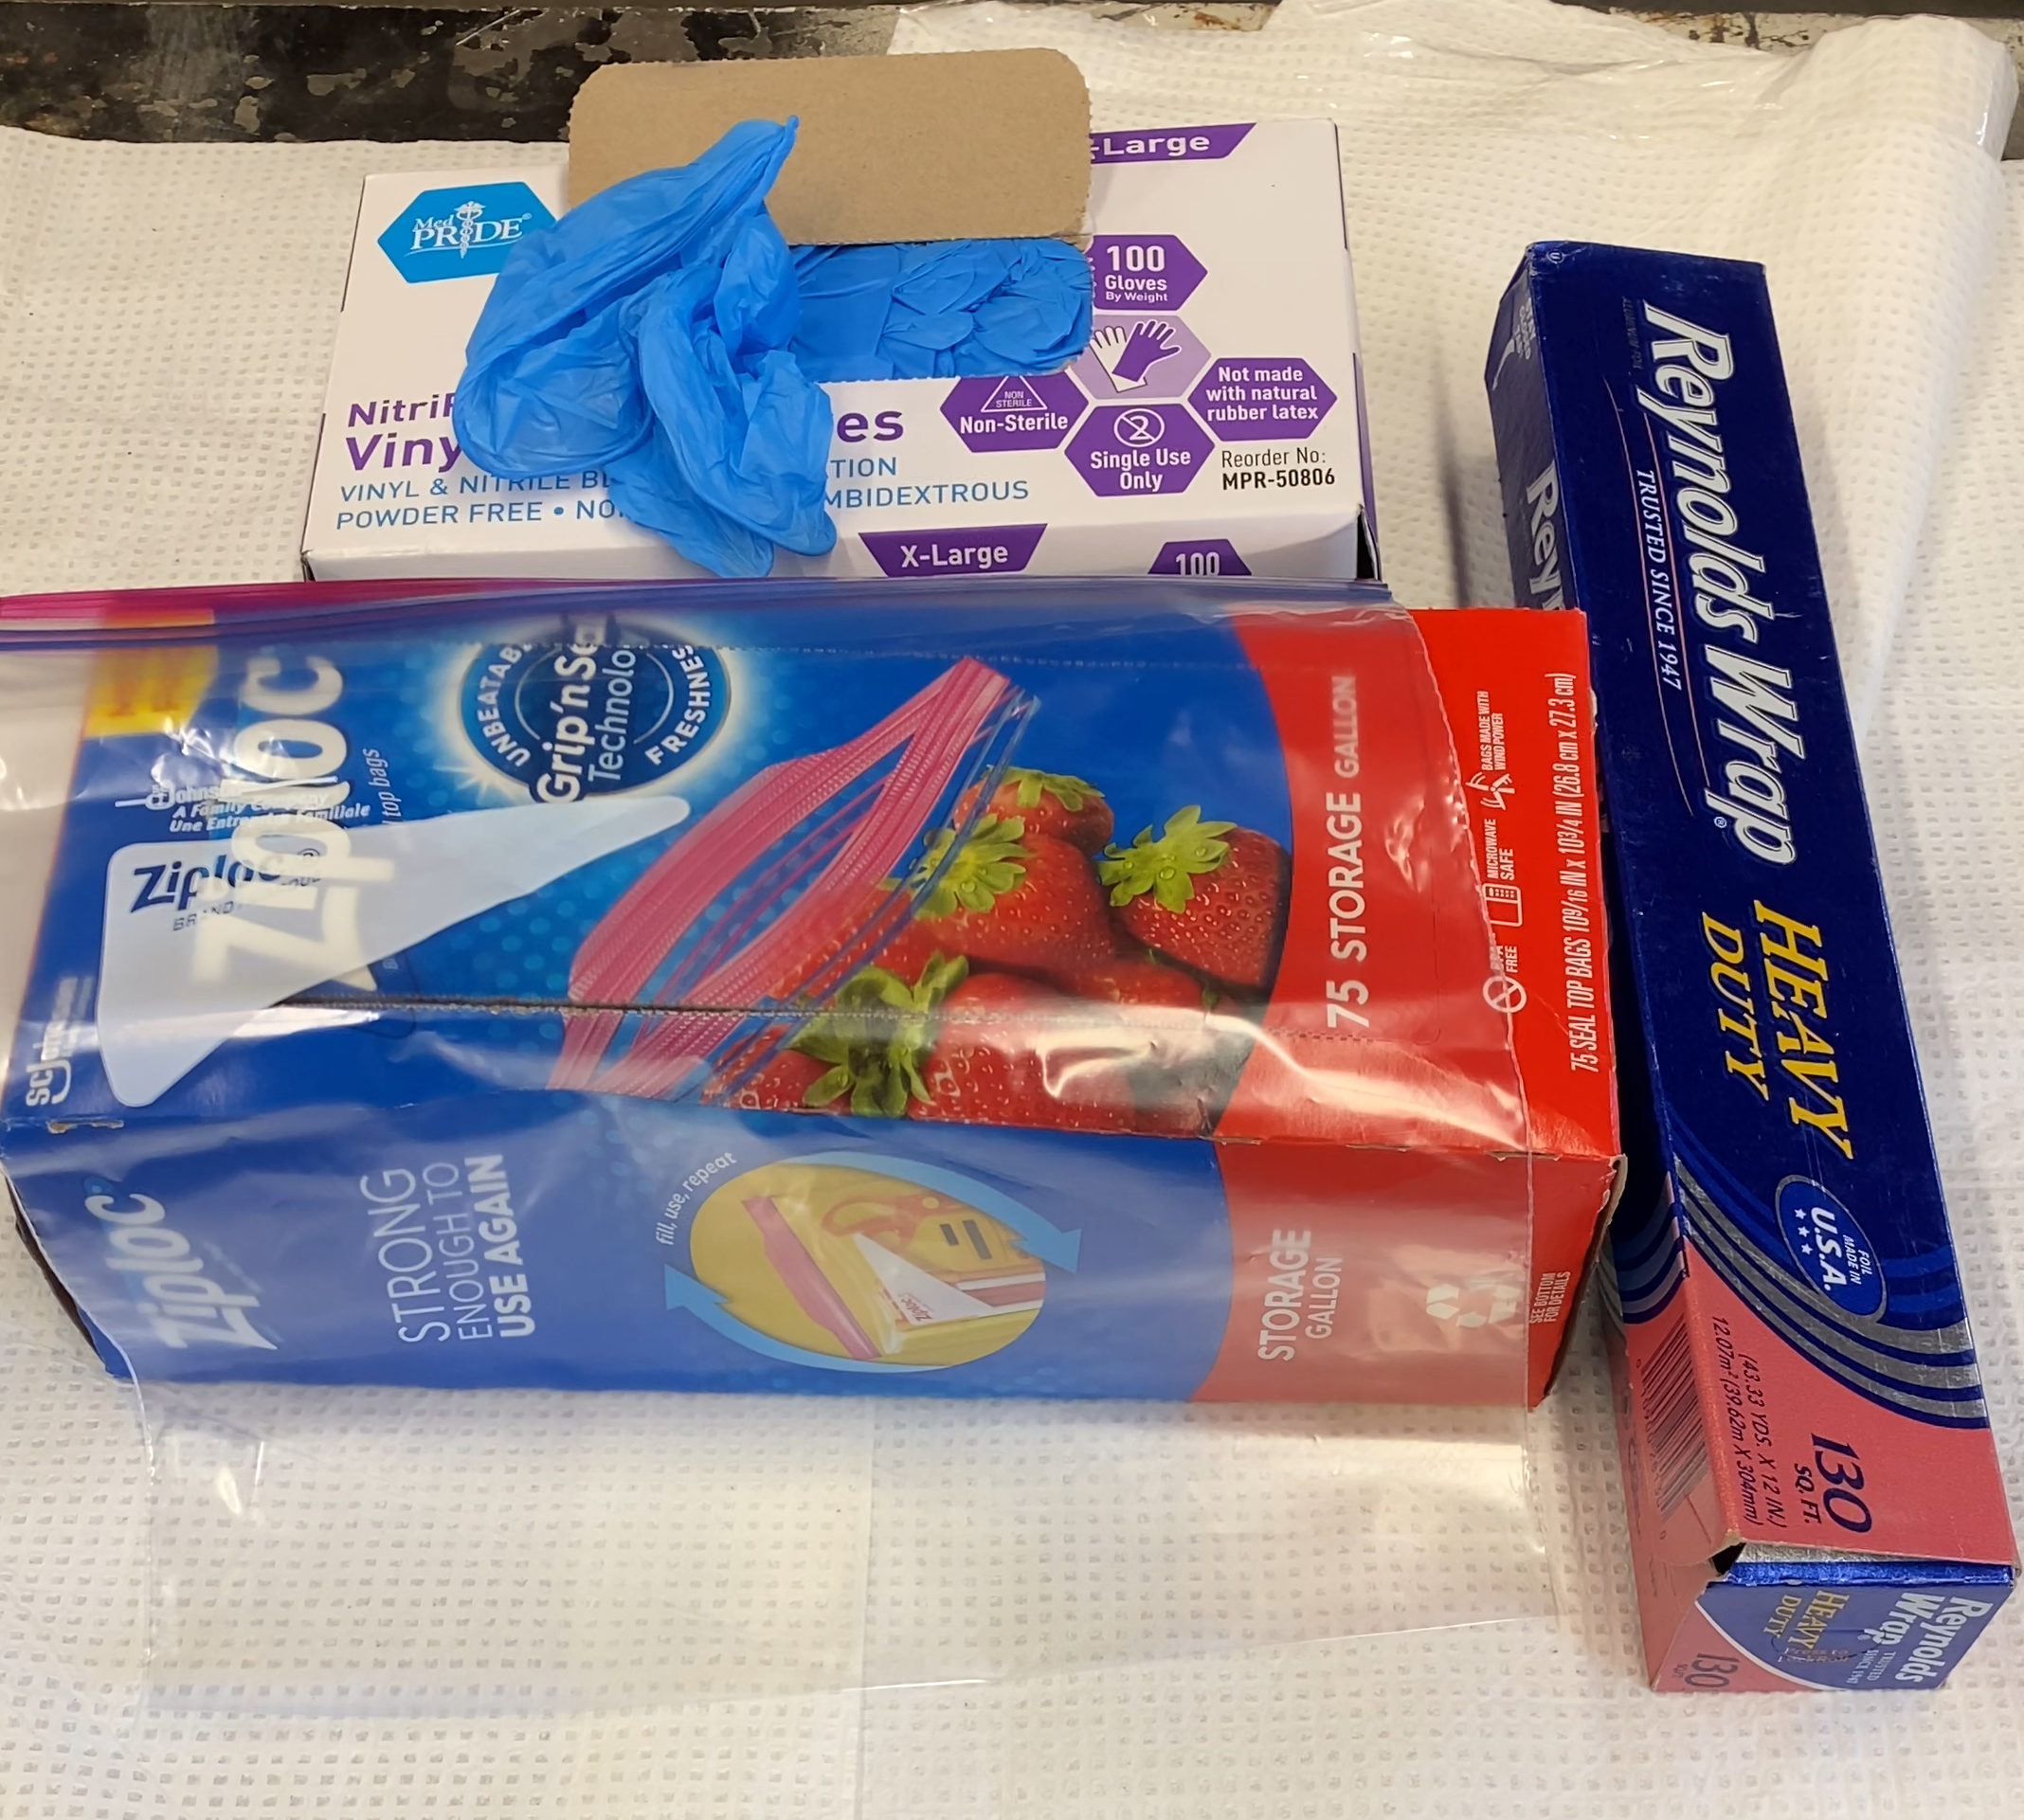
Disposable Gloves
Disposable gloves serve two functions. First, they protect you from any contaminants found in your stormwater or preservatives in your sample bottles. Second, they provide an added layer of quality assurance for your samples, preventing contaminants that may be present on your hands from entering your sample. Nitrile, Latex, or Vinyl gloves are all acceptable. Always keep plenty of gloves on hand, and be prepared to change your gloves frequently.
Ziplock Bags
Ziplock bags can have a lot of functionality during a sampling event. They can act as a clean spot to store a sample lid temporarily while sampling. They can act as a space to keep your COC and water-sensitive materials dry. They can act as a secondary container to help you sample sheet flow. Many labs will request that bottles be placed in a ziplock bag before being placed in the ice chest to protect the bottle and capture the sample in the rare case of breakage. Whatever the usage, it is a good idea to have plenty of ziplock bags in your sample kit.
Foil
Much like the ziplock bags, foil has a ton of uses in a sampling setting. It makes an infinitely adjustable clean space to help with sample handling. It can be spread out on a tailgate or other dirty surface to make it a clean spot to place bottle lids or any other critical sampling supplies. It can be wrapped around gear that you need to stay clean between sampling events and can act as a temporary lid to keep unwanted contaminants out of a sample.
7. Safety and Access Gear

This gear will vary widely depending on your specific sampling scenario. If you are sampling a simple catchbasin, you may need a grate hook and Allen wrench to access it. Larger vaults may have lids that are too heavy to remove by hand and would require specialty equipment to access. A high visibility vest is always a good idea to wear, but especially important when sampling in high-trafficked areas. Some sampling locations may be located in a hard-hat area, others might discharge into a river or lake and require a lifevest. Some sites may be located behind a locked gate, and only require a simple set of keys. Whatever the scenario may be, it is important to consider safety, and have all of that gear organized and easily accessible so that it gets used properly.
8. Sample Transport Equipment
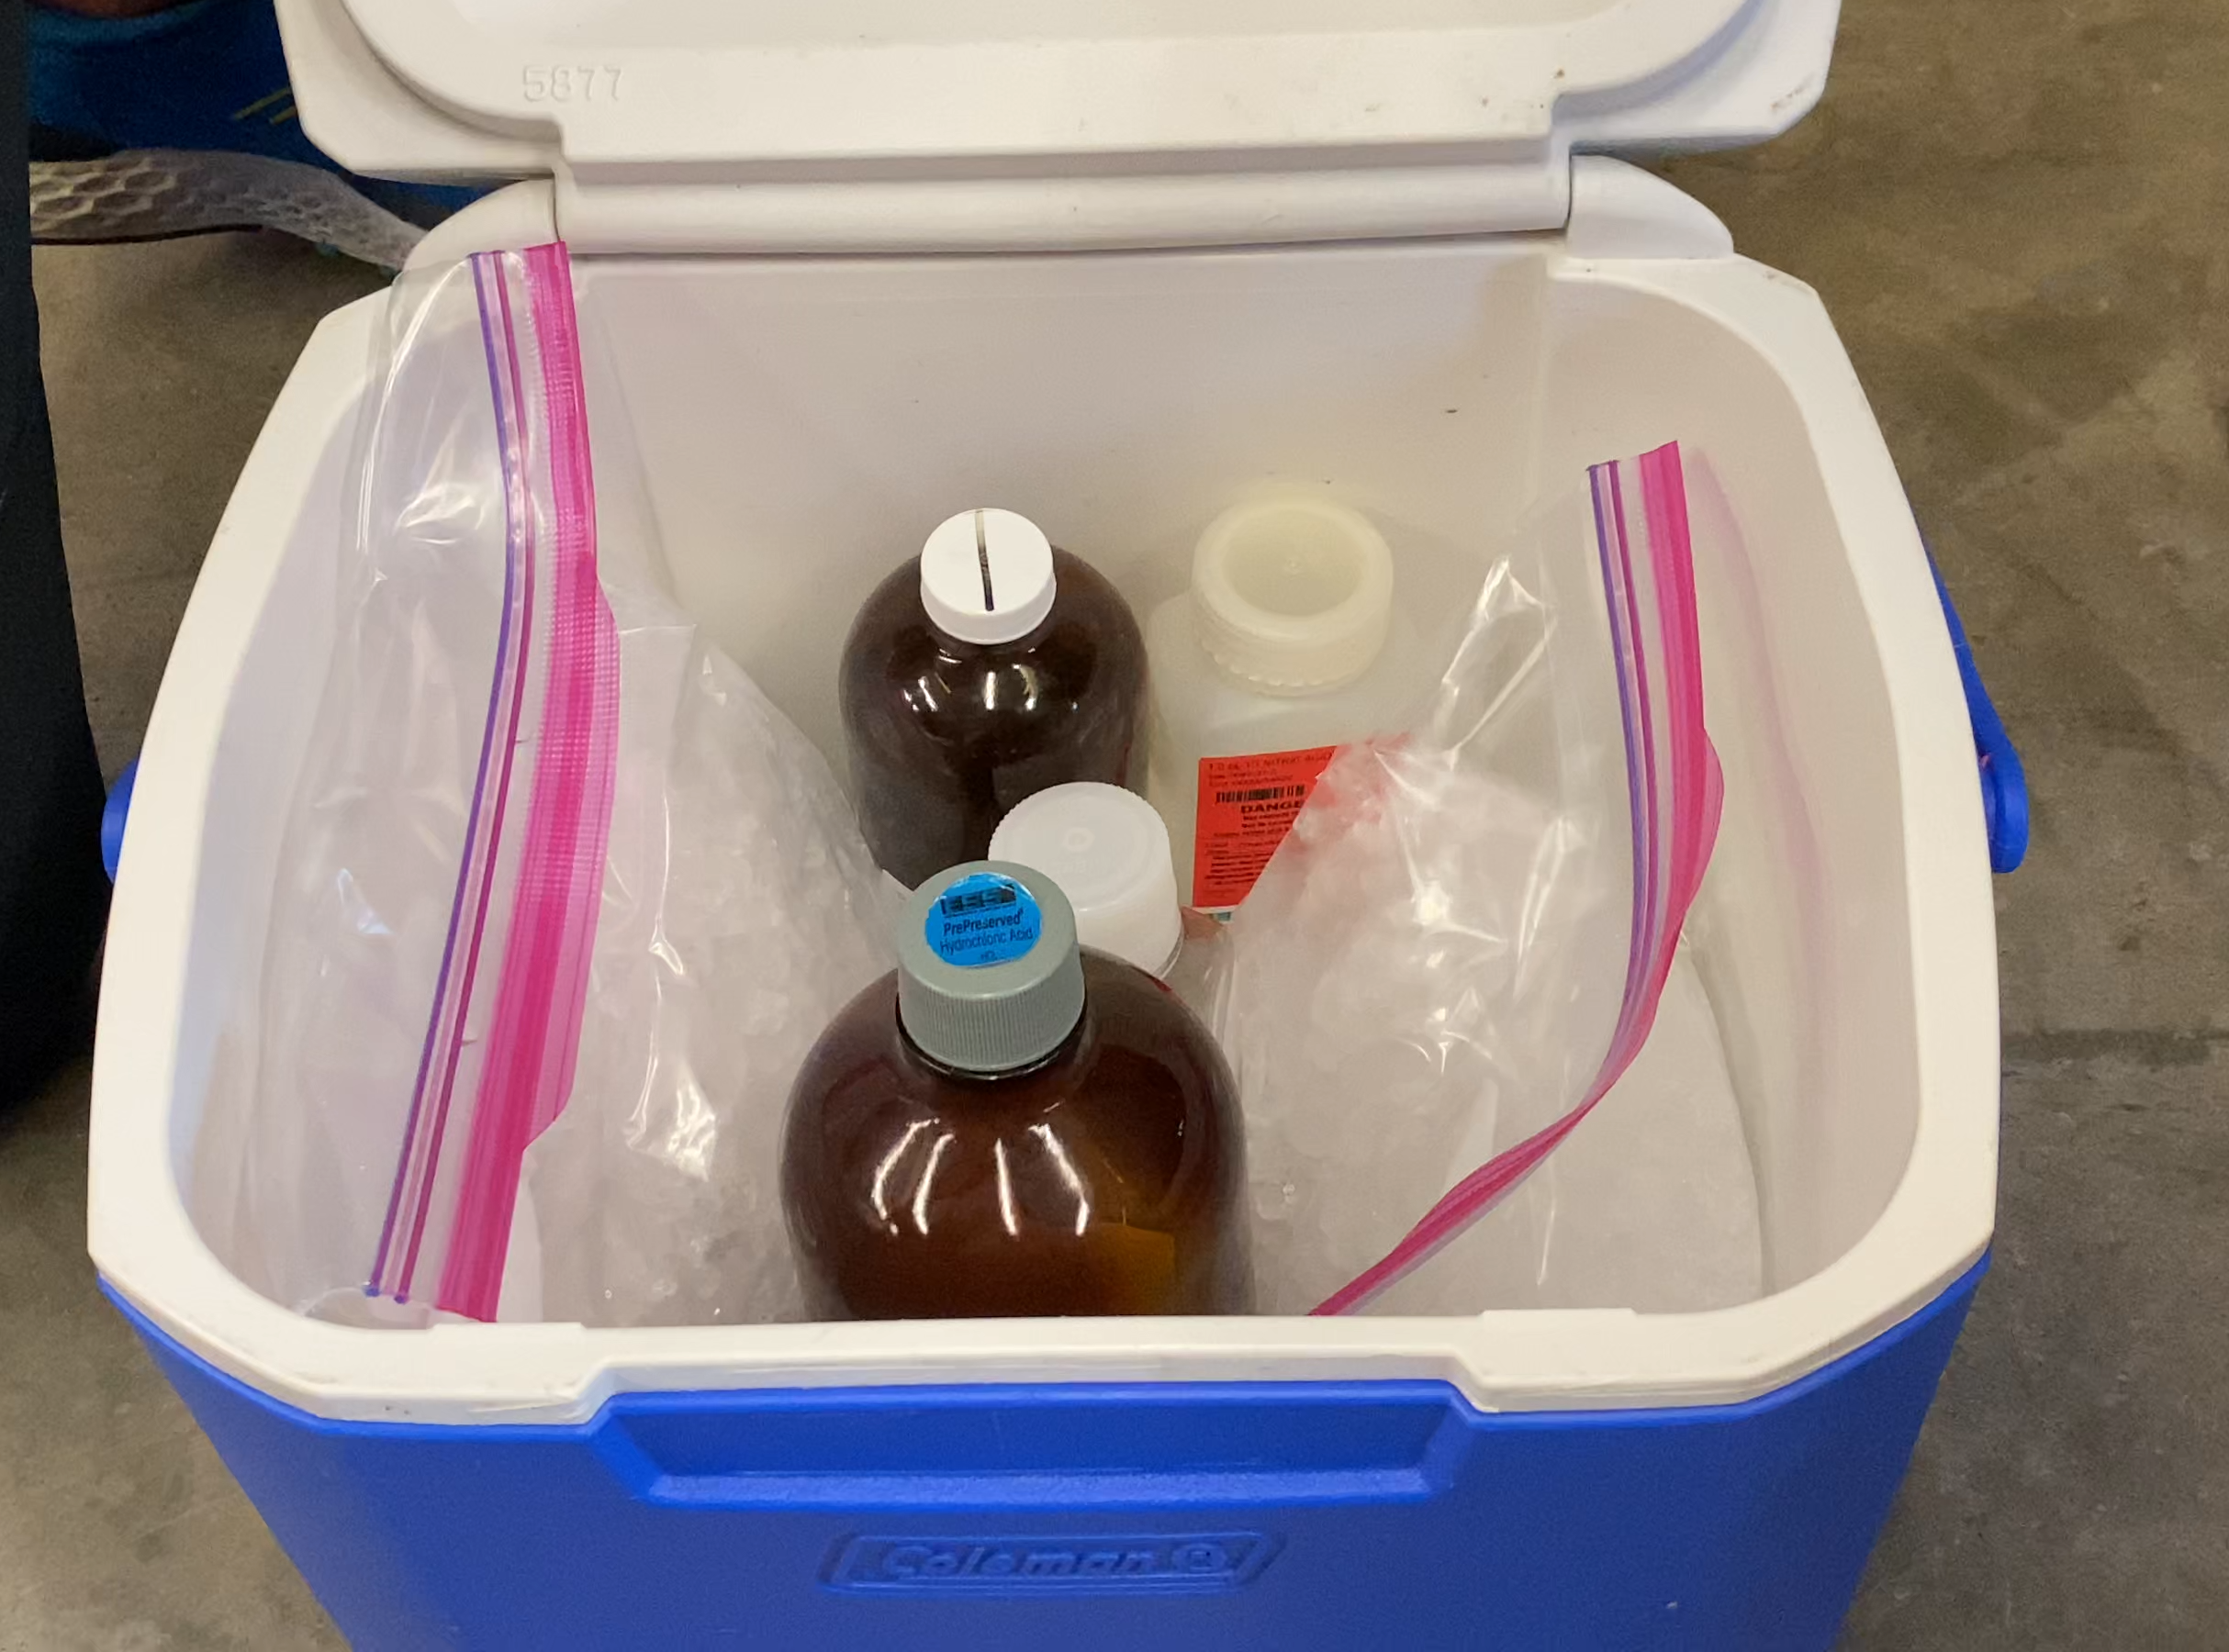
Ice chest
Make sure your ice chest is appropriately sized for your sample bottles. Many times, an ice chest will be available from your lab when you pick up sample bottles. You just want to make sure there isn’t excess room that will cause your bottles to roll around, or not be properly surrounded by ice. In some cases, bubble wrap may be necessary to protect your bottles from breakage inside your ice chest.
Ice
You will need to store your samples on ice for delivery to the lab. If possible, it is a good idea to have some on hand so you are ready to sample at a moment’s notice. If you only have a small cooler, ice packs may be all that you need. If you have to ship your samples talk with your lab about their recommendations- your lab may require that your ice is sealed in ice packs or a ziplock bag, while others may require the use of dry ice.